...
| Version of RA | 1.4 |
|---|---|
| Version of User Guide | 1.12 |
| Date of publication | July 05 17 2017 |
| Link | https://ra-preprod.bankidnorge.no/#/search/endUser |
Table of Content
| Table of Contents |
|---|
...
It is supported through the BankID PreProd support portal (https://servicedesk.bankidnorge.no/jira/servicedesk/customer/portal/1)
User Interface
The top menu has four sections as shown below

End User: Create end user Certificates for BankID and BankID for Mobile
...
- Start by selecting the Test Number Generator (if you have your favorite ID number you can skip this part and proceed directly to the End User section)
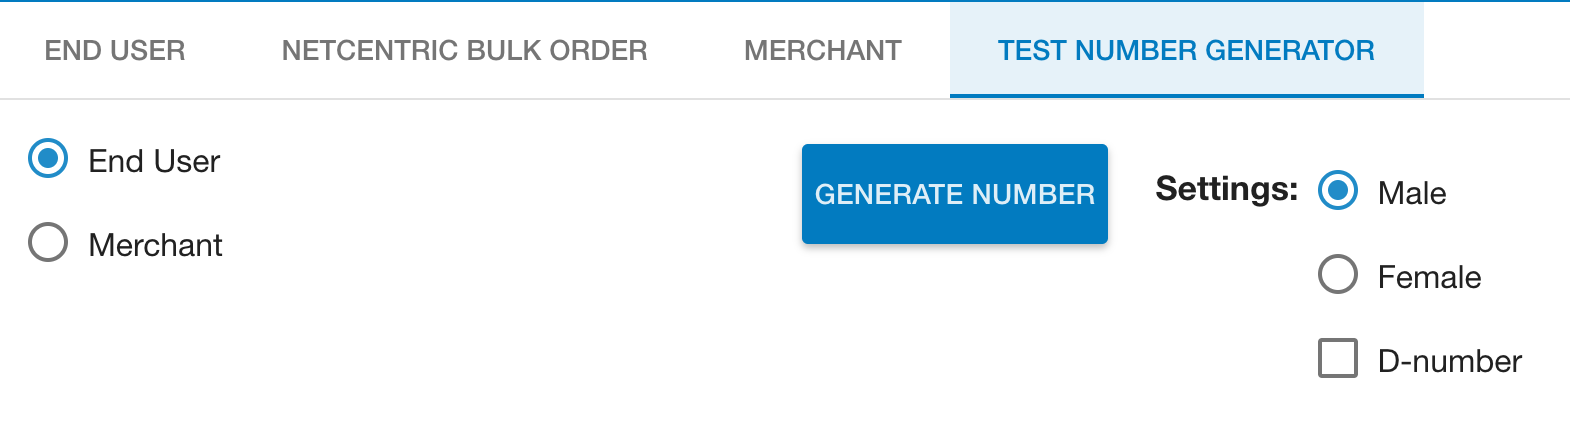
- End user is already pre selected, choose Male/Female or D-number.
- Press Generate Number
- This will take you to the End User section with the generated ID number filled in
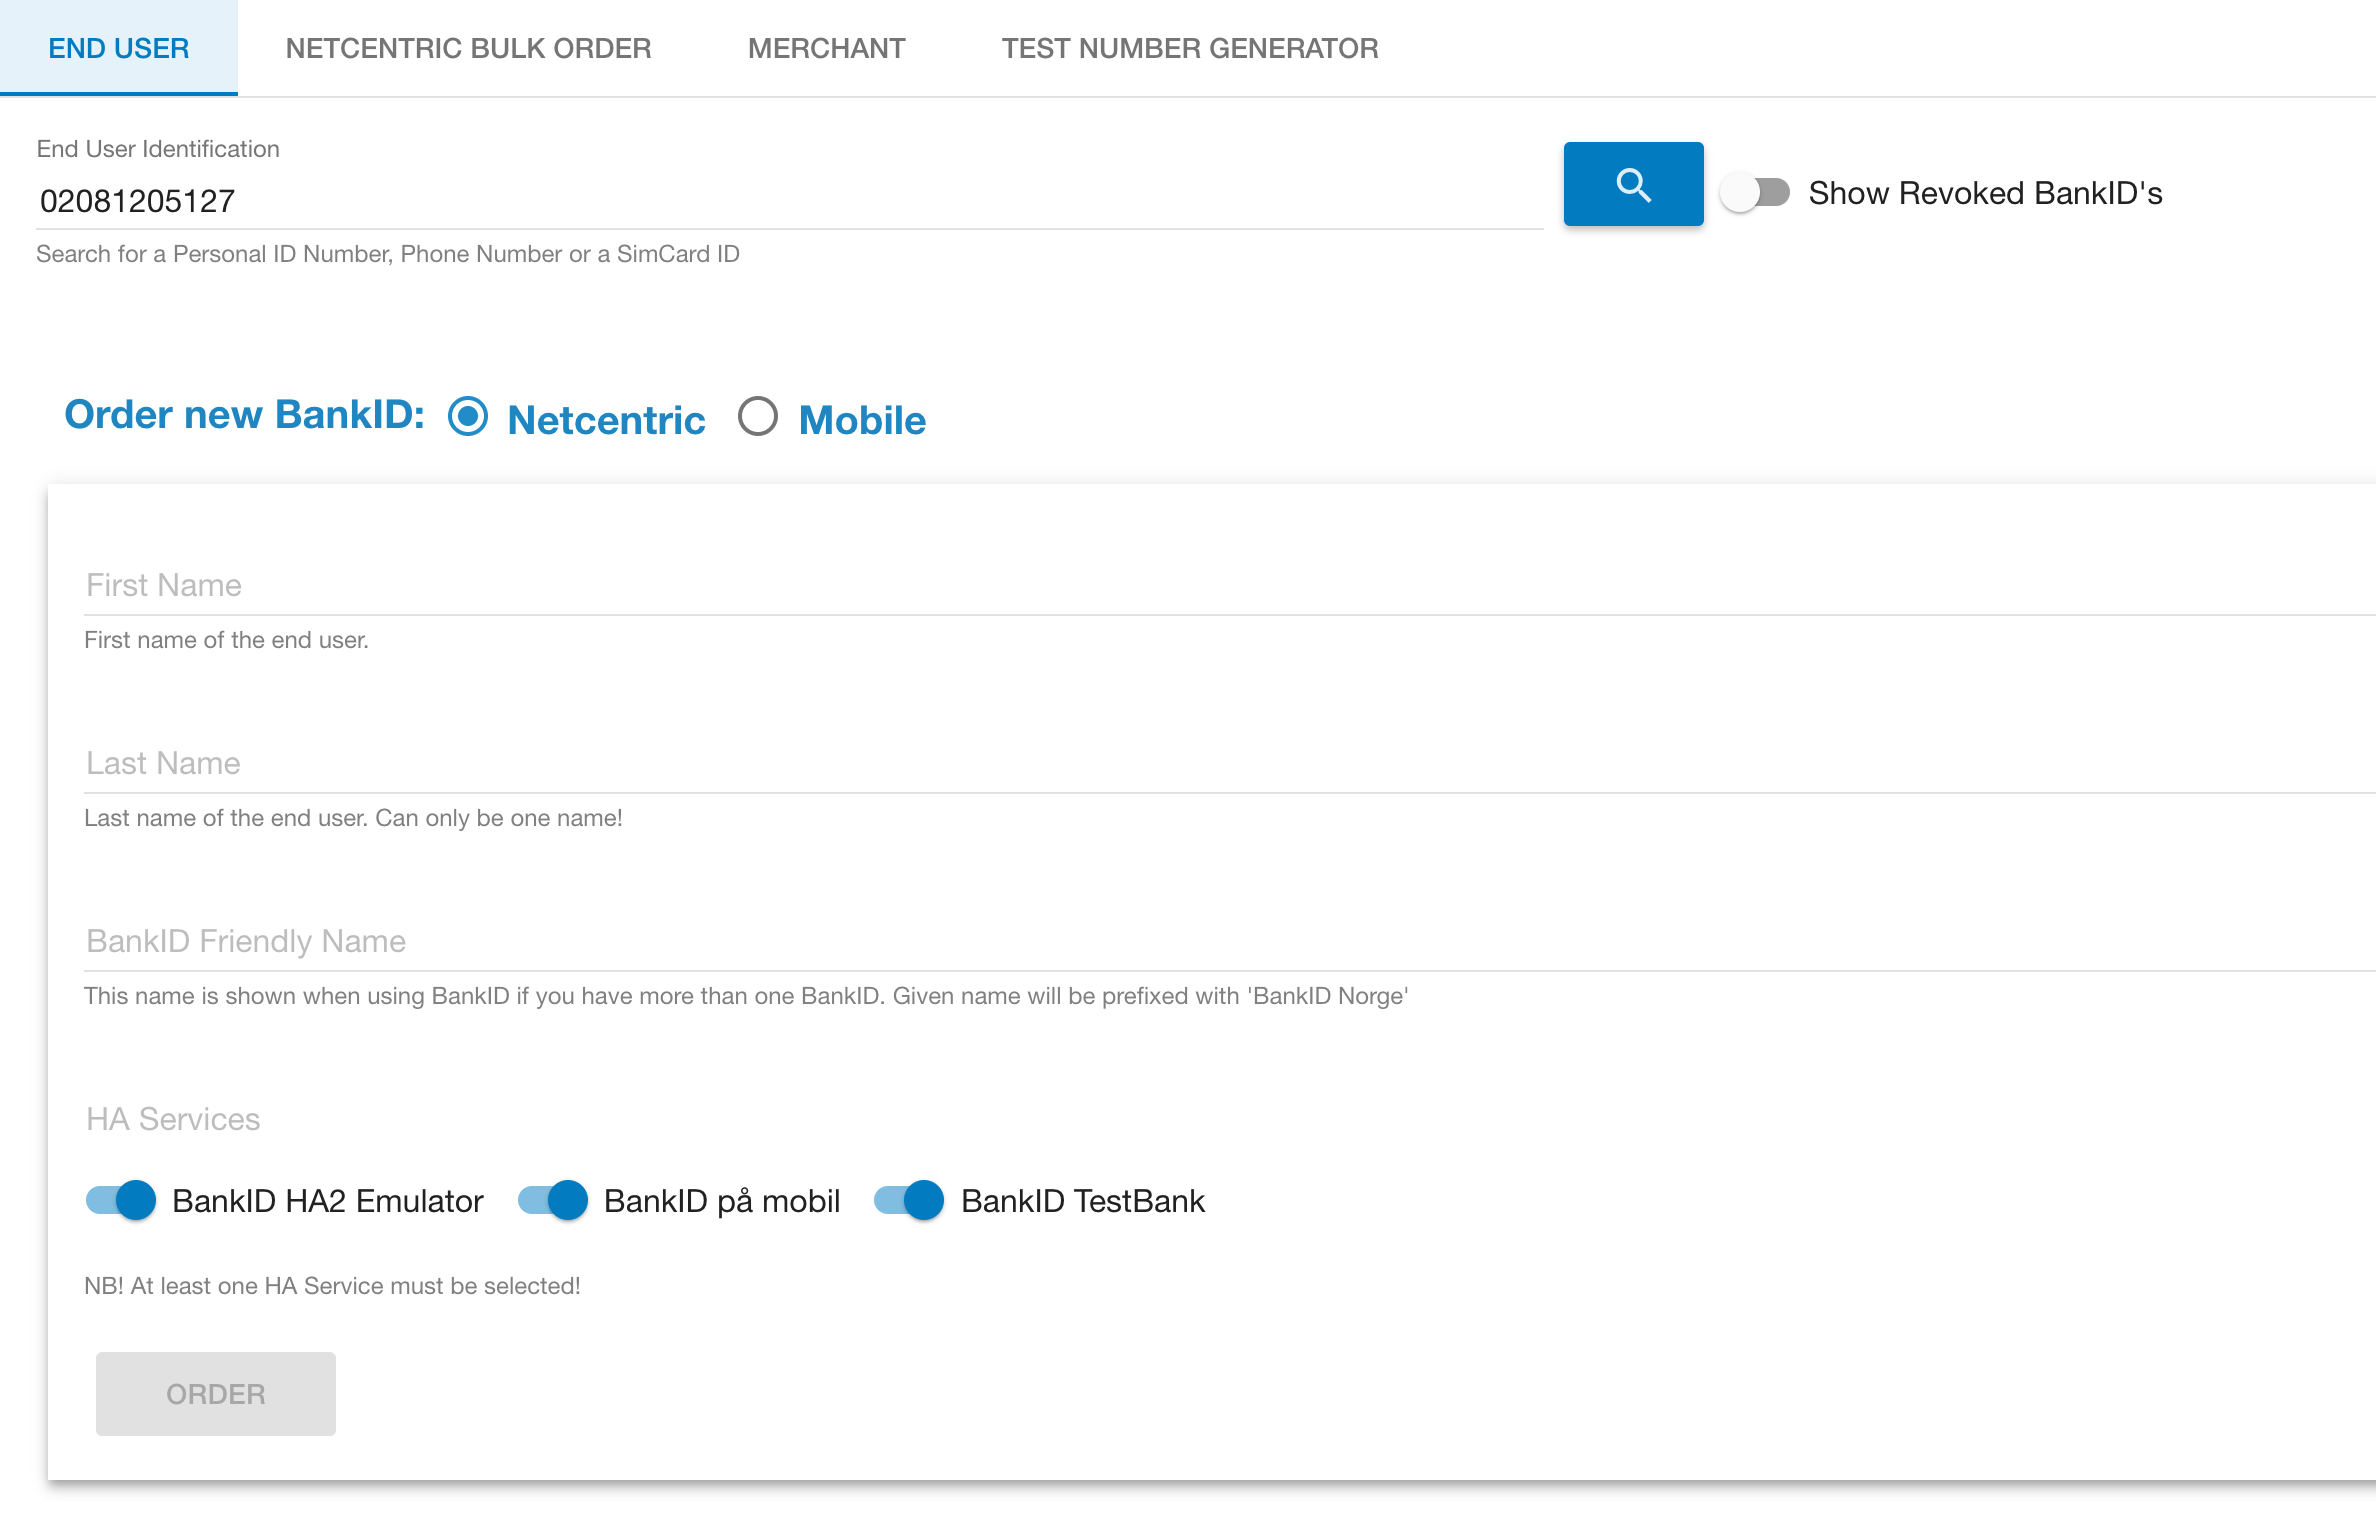
- You are now in search mode and if any existing certificates are found on this number they are listed (remember - the service is open with a common user - other may have the same favorite as you).
- You are now ready to order
...
Netcentric
- Fill in First name, Last name and BankID Friendly Name
- Select the HA elements you want. The BankID testbank is the one with a predefined OTP and password (otp and qwer1234)
- Press Order
- The page will give a confirmation in green in the header and change to show information for the chosen ID number (the same as a search would show)
- The top section shows the recorded contact info for the ID - this is just for your own use and not used by anyone. Perhaps You could use your own name and number for others to see. If a search returns contact info belonging to someone else, please consider to use a different ID number.
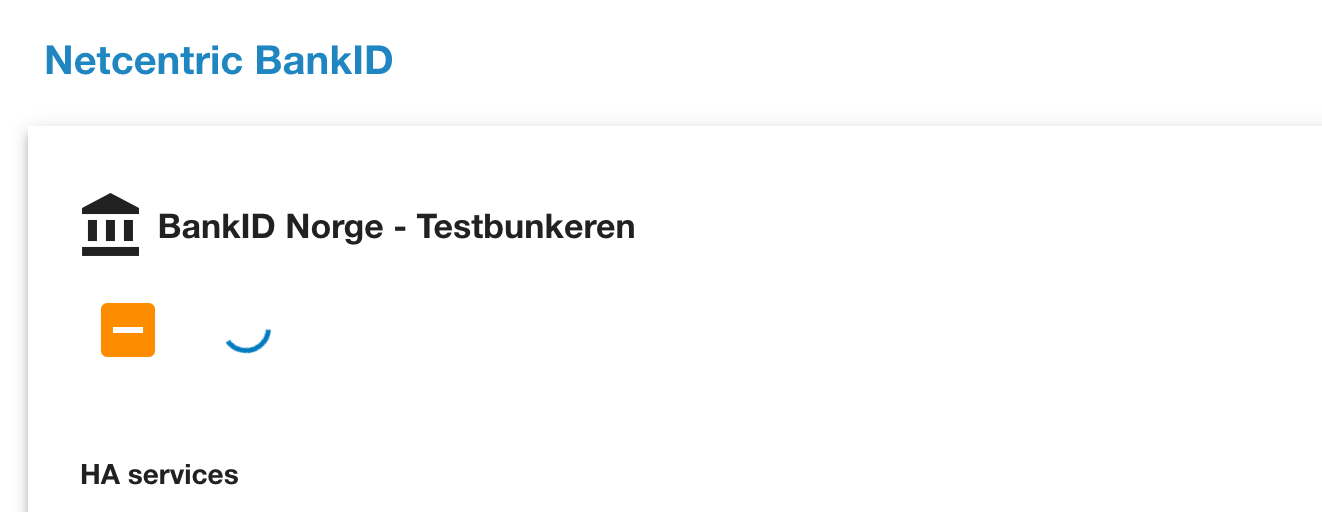
- You need to scroll down past the HA elements to see the certificate you just ordered. Initially it will have an Orange icon indicating that the order is still in progress
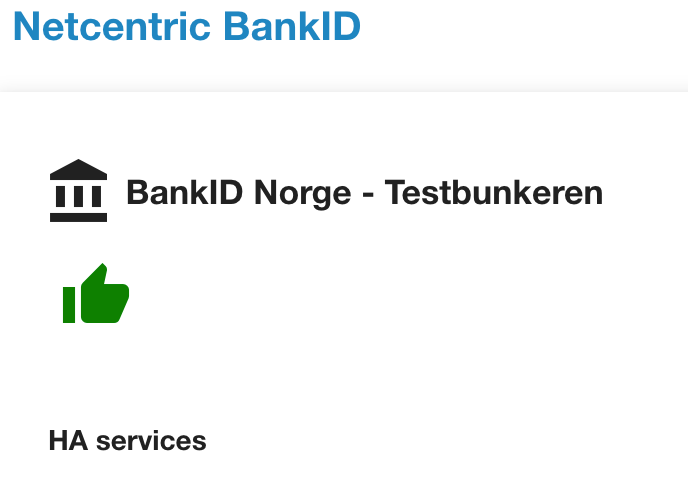
- When the backend confirms the order it will change to a green icon indicating that the certificate is ready for use
- You can now test the user in PreProd (https://tools-preprod.bankid.no/bankid-test/auth)
Mobile
| Info | ||
|---|---|---|
| ||
You will need SIM cards prepared for the PreProd environment - they can be ordered from the BankID PreProd support portal (https://servicedesk.bankidnorge.no/jira/servicedesk/customer/portal/1) |
...
- Click the Mobile checkbox in "Order New BankID"
- Fill in First name, Last name and phone number (the phone should already have the sim card inserted)
- Take note of the activation code displayed bottom right
- Press Order - this will initiate the activation process
- Follow the steps on the mobile phone and use the activation code provided
- Your new SIM card is ready for use
Merchant
- Start by selecting the Test Number Generator (if you have your favorite ID number you can skip this part and proceed directly to the Merchant section)

- Select Merchant
- Press Generate Number
- This will take you to the Merchant section with the generated ID number filled in
- A search is automatically performed to check if others have created a certificate on this ID number
- Contact information is now required and must be completed before the order form is presented - edit the details by pressing the pencil icon and press the green icon to proceed. You should use your own name and number for others to see. If a search returns contact info belonging to someone else, please consider to use a different ID number.
- Fill in the name of the organization and the common name you want.
- Press order
- The page will give a confirmation in green in the header and change to show information for the chosen ID number (the same as a search would show)The top section shows the recorded contact info for the ID - this is just for your own use and not used by anyone. Perhaps use your own name and number for others to see. If a search returns contact info belonging to someone else, please consider to use a different ID number.
- You need to scroll down past the (now empty) order form to see the certificate you just ordered. Initially it will have an Orange icon indicating that the certificate is not yet activated (note - this is different from end user, no need to sit around and wait for a green thumbs-up)
- Press the activate button, you will see a waiting message
- When the backend confirms the order it will change to a green icon indicating that the certificate is ready for use
- The .bid file is available on the right side
Bulk Order
...
| Info | ||
|---|---|---|
| ||
| There has been significant changes to the bulk order functionality - please review |
The Preprod RA supports bulk creation of BankID test certificates.
...
[Personal ID Number] [BankID Friendly Name] [Last Name] [First Name and possibly Middle Name]
...
The delimiter can be comma "," or semicolon ";" and the file format must be UTF-8 to support æ,ø,å. It is now possible to use Excel and export to CVS UTF-8 with Norwegian locale (uses semicolon as delimeter). Please note that four columns must be used as opposed to three before.
...
- Space is not permitted in Last name (use underscore)
- Not all characters are supported äöÄÖ - äöÄÖ is known to cause errors - your milage may vary
File template
Below is a template for Netcentric bulk orders. The file is in Excel .xlsx format and can be used for creating CSV UTF-8 files accepted by RA Light.
We suggest you keep a clean version of the template in .xlsx format and do a "Save As" CSV UTF-8 when saving (or rename the file before you start).
Instructions are provided in the file.
| View file | ||||
|---|---|---|---|---|
|
Helpful suggestions
- Use Excel and save as CSV UTF-8
- Make sure the cell format is Text, not number or automatic. This will strip the leading 0 from F.nr.
- Add a check column for length of F.nr (=LEN(cell ref)) or an automatic check that will add the leading 0 (=IF(LEN(A1);A1;CONCATENATE("0";A1))
- Make a template with this and copy your list into it - have the checks in column >5
- Have a separate tab where the first four columns are copied from the original tab - this is your export tab
...
| Info |
|---|
Please note that RA is still in Beta - changes will happen. |
...